Showing posts with label Air fryer. Show all posts

Saturday, 22 October 2022

Chocolate Canelé 巧克力可麗露 Air fryer

A few years ago, my friend H, helped me to buy these beautiful Canelé molds from France and it has been sitting in my drawers all this while.  Finally, I brought them out to shine.


Since I am not confident baking Canelé, decided to just try a small batch of Chocolate Canelé 巧克力可麗露 first.  Baking in the air fryer seems like a good idea as the temperature is more reliable and since I only have 9 molds and it is not enough for a full recipe.


These looks burnt but it is not.  In fact, it is full of chocolatey taste and it was nice and not too sweet.  Also, it has a crusty coat which I thought I was heading to success but .....

I was sooooo wrong!  The inside was not baked properly.  I reckon because I forgot to set back the timer and walked away to do another errand.


Learnings: I failed in my mission.  Though I get a crust but the inner was not baked well. The taste is actually not bad, and also not too sweet.

I must also think of a way to wrap the foil more tightly.  Tricky as the mould was really too hot to handle.

Will try again.

What you need:
Yield: 8 pcs

250g milk  
30g butter
60g chocolate (70%)
1 tsp vanilla bean
125g sugar
45g cake flour
3g cocoa powder
1/4 tsp salt
1 egg
25g rum

Method:

Bring milk, butter, and vanilla beans to a light boil.

Pour into the chocolate, and wait for a while before stirring to melt the chocolate.

In a bowl, sift cake flour, and cocoa powder and mix with the sugar and salt.  

Pour the warm milk mixture slowly into the flour mixture, whisking slowly.

Whisk in the egg until the batter is smooth.

Add in the rum.

Sieve into a clean container, clingwrap, and chill for a night.

Bring mixture to room temperature.  

Grease the mold well with oil or butter.  

Pour batter to 90% full.  

Bake at 200℃ for 20 mins, then individually wrapped with aluminum foil.

Lower heat to 180℃ and bake for 40 mins.

Remove from mold immediately and let it cool completely.

Enjoy!

Monday, 28 September 2020

Air fried Five Spice Chicken 烤五香雞

During a small pocket of time, while checking on FB, this Roast Five Spice Chicken 烤五香雞 captivated me.  Am glad that I marinate this overnight as the flavour is more in dept.

Ever since I discovered these tiny chicken, I am getting the hang of handling whole chicken.  In fact, I am loving it because it is still juicy.

Now that I butterfly the chicken, it is so fast to cook. 


Adapted

What you need:

2 small chicken, wash and drain.  Remove the butt.
2 tsp garlic powder
2 tsp five spice powder
1 tbsp light soy sauce (as my soy sauce is rather dark)
2 tbsp oyster sauce
1 tsp salt
2 tbsp sesame oil 

Method: 

Using a scissor, butterfly cut the chicken.  Starts from the breast. 

In a bowl, combine all the marinate and mix well.

Rub well into the chicken. Let it chill overnight in the fridge. 

Preheat air fryer to 180⁰C for 3 mins.
 
Roast for 10 mins for each chicken. 

Baste the marinate once during the roasting.


Brush a thin layer of sesame oil once out of the oven.

Enjoy!

Monday, 22 April 2019

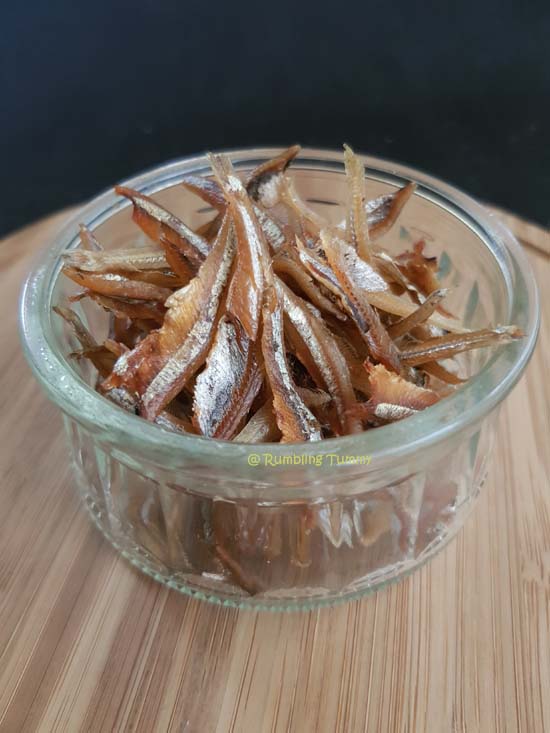
Air fried Ikan Bilis

In the past, I always have trouble getting crispy ikan bilis.   Mine was either burnt or it wasn't crispy.  Later on, I learnt that I need to drain the ikan bilis well before frying them in low heat first and then increase the heat to high to crisp it.

Years later, someone told me that outside vendors do not wash their ikan bilis and that is why it is crispy.

I have tried that method too and it was indeed very crispy but the thought of these babies sunbathing in the open with flies buzzing around, did not appeal to me the least bits.

Using air fryer to fry Ikan Bilis really save me a lot of oil.

On the other hand, I was able to achieve both the crispness as well as the hygiene factors using the air fryer.

These Air Fried Ikan Bilis is going to be an accompaniment and the rest will be  TV snack for hubby.


What you need:

200g ikan bilis
1 tbsp oil

Method:

Rinse the ikan bilis and drain.

Preheat air fryer to 160°C.  Air fry them for 10 mins in the basket.

Remove and place them into a 7" baking pan.

Add oil, mix evenly and air fried them at 140°C for 10 mins or until crispy. (depending on the size of your ikan bilis)

Remove and cool completely before storing in airtight container.


Enjoy!

Thursday, 18 April 2019

Air fried peanuts

I used to use the wok to fry raw peanuts.  

3 pointers mom taught were:
  • Maintain medium low heat.
  • Stirring often to ensure all peanuts are evenly cooked.
  • Listen from "heavy" to "light" tone (Light means the peanut is cooked).
To remove skin:
  • Pour onto a clean tea towel and rub.
  • Use the colander to "sift" out the skin.
For me, I find this tedious and luckily I am no fan of peanuts unless the recipe calls for it.

So today, I am trying the air fried method.  

This air fried peanuts turned out crunchy and nicely brown in less than 15 mins without monitoring.  


This peanut is for a "project" that I am going to experience.

For the balance, hubby can have it as snack whom I am sure he will be delighted as he is a nut lover.

Learning: Though I am no fan of peanuts I am glad that I made the decision to buy this variety (small and round).  It turned out really sweet and it has that light texture to it.  Crunchy and sweet..... mmmm... this might turn me into a peanut lover soon.

What you need:

200g raw peanuts
1 tbsp peanut oil
½ tsp salt

Method:

Preheat air fryer to 140°C.  

Add the raw peanuts into a 7" baking pan.

Air fried it for 10 mins.

Add in peanut oil and salt and mix to evenly coat.  Return pan to the air fryer.

Air fried it for another 5 mins at 160°C. 

Cool completely before storing in airtight container.


Enjoy!

Thursday, 18 May 2017

Chocolate Chiffon Cake (air baked)

I have been down and out when I caught a nasty bug during my short break away.  Been a while I fell so ill and it is taking a long time for me to gain back my strength and momentum.  

Since I am craving for something sweet and my son is coming back from his own short break with his classmates, I thought it will be nice as a welcome home dessert for him.

About this Chocolate Chiffon Cake, I have already tried baking it twice.  The first time, I wasn't not happy with the texture as it was too moist.  The 2nd time, I baked it for my dad's birthday and it turned out well.  

It did not bother me that I don't have a chiffon pan that fits into the air fryer.  Anyway, it is not a must to have a chiffon pan to bake a chiffon cake.


While updating my FB Page, I realised that I always bake chocolate cake.  Guess it is time to try other flavours.

Enough said, now I am satisfied and hope this horrible bug I can get rid soon.

Observation: The cake is very soft and moist but able to "bounce" back when pressed.  The sweetness is just right for us.  

What you  need:

3 egg yolks
25g sugar
1 tbsp chocolate paste
50ml milk
3 tsp bran rice oil

50g cake flour

10g cocoa powder
1 tsp baking powder
3 egg white
45g sugar
¼ tsp cream of tartar

Method:

Line the bottom of a 7" round cake tin with grease proof paper.  Do not grease tin.

Whisk egg yolks with sugar till light and creamy

Add oil, milk and chocolate paste and combine well, then set it aside.

Sift in cake flour, cocoa powder and baking powder.  Whisk until smooth.

In another clean bowl, whisk egg white until foamy and add cream of tartar.

Add sugar in 3 batches. Continue to beat the egg white mixture till stiff peak is formed.

Fold ⅓ egg white into the egg yolk mixture till well mixed. Lightly fold in the rest of the egg whites with spatula until combined.

Pour 1 cup water in the bottom pan of the air fryer and preheat at 150°C.

Pour the batter into the cake tin.

Give the cake tin a few taps at the bottom to remove any huge air pockets.

Bake for approximately 25 mins.

Do take note not to fill the batter all the way to the brim of the cake tin, leave about ¼ of the space for cake to rise.

Once cake is baked, do a skewer test check to ensure the batter is fully cooked.

Remove cake tin from airfryer, invert the cake tin and allow the cake to cool completely before unmoulding.


Enjoy!

Thursday, 13 April 2017

Milk Bread (Herman starter) Air fryer

Since I have no one to pass on the Herman Starter, I needed another recipe to use this starter. 

Saw CC posted her experience with this recipe using Herman starter and I was game to try too.


Findings: I am not sure whether it is due to my starter but I had problem getting the volume for the 1st proofing.  Since it was late, I left it in the fridge to proof overnight. 

It did not double in volume when it was in the fridge as well so I thought I might as well complete the process.  If it failed, it will goes into the bin.  

Surprisingly, after let it out to proof in the microwave oven with a hot towel, my bread finally awake and rose nicely.    This is seriously a slooow ferment day but I am happy that my patience paid off.

Thanks to CC for giving me the assurance last night too.


The texture is really nice and soft.  Totally love it.

Now I don't have to clank up the oven on this hot day to enjoy a nice fluffy bun.

Definitely a keeper!

Adapted : Source

What you need:

250g bread flour
100g Herman Starter
8g vegetable oil
155g fresh milk, room temp
5g fine salt

20g unsalted butter, softened

Black and white sesame seeds

Method:

Combine all the ingredients except butter into a mixing bowl.   Mix until a rough dough is form.  Let it rest for 15 mins covered.

Using a dough hook, knead until dough is smooth (approx 10 mins).

Add in butter and continue to knead until pass window pane stage.

Tension shape into a ball.

Place in an airtight oiled bowl and let it proof until double in size.

Place dough in the fridge overnight.

Thaw for one hr, remove from bowl.  

Punch down and rolled into a disc.  

Divide the dough and shape into a ball.  Let it rest for 15 mins.

Flatten with a rolling pin and roll into a rectangle.  Roll up the dough and place into a greased pan.  Let it rest until double in size in a warm place.


Preheat air fryer and bake at 170°C for 20 - 25 mins. or until done.


Remove from tin and cool off on rack.


Wednesday, 12 April 2017

Friendship cake (Herman cake) Air fryer

Ever since CH gave me some sourdough starter, I was intrigue by this fermentation world.  It seems endless of stuff that we can do with fermentation.  Each day I discovered more and more.  Thanks to friends who are so willing to share their knowledge.

FK also gave me some water kefir grains and Kombucha scoby.  I did have a big challenge for that journey and finally I have success brewing my own Kombucha and water kefir where I will document my learning later on.  

For this time, I will introduce you to Herman Starter.  A sweet tasting dough starter for those who does not like the sour taste in sourdough bread.  

Thanks to CT for sorting out my fizzy brain.  For a moment, I though I fed my Herman wrongly.    Thanks for ensuring me the ratio 1:1:1:1 is the right combination and not needing it to bin after 10 days of effort.

Thanks also to JA for sharing with me this starter.

So for a start, I shall begin with the famous Friendship Cake using Herman Starter.  Since I have not used my air fryer for quite some time, I decided to use it to bake as well.  

If you are keen, feel free to take a portion of this Herman Starter from me too.


Findings: The batter texture is really thick and it reminded me of my Hampton fruit mixture.  It is an extremely fuss free recipe to attempt.   

I made the mistake of foil wrap the cake as I was worried that it will rise too much.  When I extended another 15 mins without the foil, I had a little burnt top from it.  Should have foil wrap after that 30 mins.

I baked it for 45 mins at 170°C but my cake wasn't done by then, I have to increased it by another 15 mins.  

The cake has a nice crust when freshly bake and the texture is moist too.

Now my whole house smell so good due to the high dose of cinnamon.

What you need:

220g Herman Starter
225g sugar (I reduced to 200g)
300g plain flour
½ tsp salt
2/3 cup of cooking oil
2 eggs
2 tsp vanilla essence
2 cooking apples cut into chunks
200g raisins
2 heaped tsp cinnamon
2 heaped tsp baking powder

¼ cup brown sugar
¼ cup melted butter, adding this helps to moisten the cake.

Method:

Preheat air fryer to 170°C.  Greased and lined a 8" round pan.

Mix all the above ingredients together until well combined.

Pour into prepared tin.

Sprinkle with brown sugar and melted butter.

Bake for 45 minutes or to test the middle with a clean knife


Noted: you may need to cover in tin foil and bake for a further 20 minutes to make sure your Herman is cooked properly in the middle.


Cheers

Friday, 20 January 2017

Crab stick cracker

Actually I am not a fan of crab stick as I find the flavouring really strong.  This Crab stick cracker was quite popular and many people did it before.  For me, I did tried once but it turned soft quite quickly. 

So this year, I take extra steps to ensure that the crackers will retain their crispiness. 


Findings: I air dry it because I wanted to remove moisture so that I can fry it better.

I took a further step and air fry it to make sure the oil is well drain off and the cracker stays crispy longer.

What you need:

Imitation Crab stick (I used Dodo brand)
Oil for deep frying

Method:

Remove the plastic wrapping.

Unroll the layers and tear off according to the size you want.

Spread onto a cooling rack and air dry it.

Heat oil to small to med heat and deep fried for about 30 sec.

Increase heat to continue to fry until light brown.

Remove and drain.

Using the air fryer, set at 165°C, air fried it for 3 mins to remove excess oil.

Cool on rack completely before storing.


Enjoy!


Wednesday, 31 August 2016

Baked Cauliflower (Airfryer)

My kiddos love cheese, as a mom, I often want entice them with food that has cheeses in it.

One such dish is Baked Cauliflower.  If I am preparing many items as meal on that day.  This baked cauliflower I must say save me lot of time and yet taste yummy.

This time round, I omitted the cream and used an airfryer to prepare.  Surprisingly the cauliflower was baked nicely.


What you need:

1 med size head of cauliflower
Cheddar and mozzarella cheese
Salt and pepper to taste

Method:

Cut cauliflower into small pieces.  Remove centre stem.

Lined a oven proof plate with baking paper.

Arrange cauliflower on it.

Sprinkle salt and pepper.

Air fried at 160 deg for 10 mins.  Remove and turn the vegetable around.

Bake for another 10 mins until it is soft.  If not, continue another 5 - 10 mins until it is cooked.

Increase to 180 deg in the air fryer.

Sprinkle generous amount of cheeses.

Bake for 5 - 8 mins or until cheeses turned golden brown.

Remove and serve.


Friday, 15 July 2016

Easy Muah Chee 麻糍

Last year, I was seeking out a Muah Chee recipe that allows me to pre prepared for an event.  Serving 400 portions of this is no joke.  I can't imagine myself stirring a big portion of dough in shallot oil.

Thanks to Anncoo Journal, I tried her recipe that uses the steaming method and it turned out to be a huge success.  Even the chairman wanted the recipe! and some kids even came back for second helping.

This year, the committee approached me to do the same and since I didn't not document it last year, I thought it will be better if I do it now as I can't recall the quantity I used for 400 servings.

Last year I used a coarser peanut and I need 2kg of it, this year I used the med coarse ones and I only needed 1kg.  I wonder why or was it that I made a bigger batch last year?  Definitely need to document as memory deteriorate by the years.

Note to self: I need 1750g flour for 400 students, 1kg peanuts, 1 kg sugar


Findings:  I have gotten very good responses for this recipe.  Even the older folks gave a thumbs up.

Best of all, it stay soft.

Definitely a keeper!

If you like a even softer texture, just increase the water ratio.

For the home made portion, I actually air fried the raw peanuts.  It is really easy and fuss free.

What you need:

200g raw peanuts

Method:

Remove impurities and give a quick rinse to the raw peanuts.

Preheat air fryer to 140 deg.  Air fried for 12 mins.

Increase temperature to 160 deg and continue to air fry for another 6 mins.

Thanks Ann for sharing.


What you need:

250g glutinous rice flour
3 tbsp caster sugar
375g water 

Adjust sweetness to your liking
Fine sugar
Roasted peanuts, crushed

Method:

Grease some vegetable oil on a 8” round cake tin.

Bring water to boil in a wok or steaming pot and steam the greased cake tin over high heat for 2 mins.

Mix glutinous rice flour and castor sugar together in a large bowl and gradually add water into it.

Whisk batter till smooth and pour batter into the hot cake tin.

Cover lid and steam for 30 minutes over medium low heat.

Leave cooked sticky dough to cool.

Cut cool dough into bite size, coat with sugar and peanut mixture.

Serve


Monday, 20 June 2016

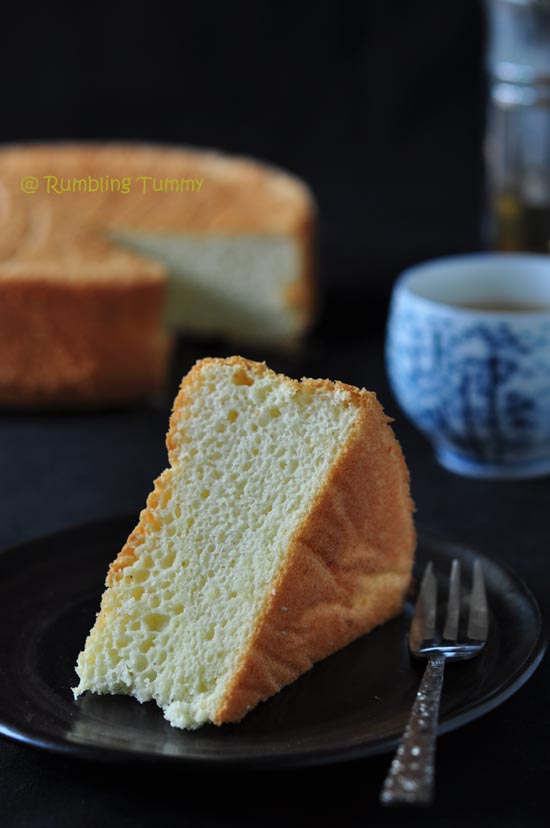
Sponge Cake (Air fryer)

I needed a sponge cake for another project so since I have bookmarked this recipe for the longest time.  I shall try it today.

Making a cake using air fryer wasn't my first time.  I have done a Marble Cake using air fryer before.  Then again, marble cake is easy and not so "sensitive" than sponge cake.  In fact, for beginner, I always suggest baking a marble cake first or rather a butter cake first.

For this recipe, this is my second attempt on this Sponge Cake (Air Fryer).  As I said before, I am not good with sponge cake. The first time, it deflated after baking.

This time round, I stay really focus in each step of the preparation. First I beat my egg white until stiff and then the egg yolk batter reached that ribbon stage.

I learnt that pouring in the batter slowly helps to "burst" those big bubbles and was glad that this works better than dropping the cake batter tin before baking.

I was disappointed that my sponge yield large air pockets.  I think I know where is my mistake.  I shall take note when beating my egg whites next time.


Overall, I am happy that this sponge cake using air fryer turned out well.

At least a decent cake to present.


Adapted: Jennifer Tan

What you need:

4 egg yolks
30g fine sugar
¼ tsp salt
1 tbsp vanilla
40g fresh milk
3 tbsp coconut oil
80g cake flour
½ tsp baking powder

4 egg whites
30g fine sugar
¼ tsp cream of tartar

Method:

Lined and greased a 8” round baking pan.

Whisk egg white and cream of tartar until foamy.

Add castor sugar in two addition, whisk well after each addition.  Whisk until until stiff peaks.  Set aside.

Whisk the egg yolk, salt and sugar till ribbon stage.

Add in coconut oil, milk and vanilla.  Whisk well.

Sift in cake flour and baking powder.  Whisk until well combined and smooth.

Fold ½ of the meringue into the egg yolk mixture with a spatula till combine.  Fold in the remaining.

Slowly pour the batter into baking pan, this helps to release big air bubbles.

Cover the pan with aluminum foil. Press tightly on the side and poke a few holes on top.

Air fry at 140°C for 15 mins .

Remove the aluminum foil and continue baking at 140°C for 45 mins.

Cake is baked when skewer come out clean.  Transfer to cooling rack and cool completely before slicing.


Will be nice to go with some strawberries and cream if we didn't ate up the punnet of strawberries last night.

Now please join us for tea.


Wednesday, 28 October 2015

Lava Cheese Tart 流心芝士撻 (1) (Airfryer)

Lava Cheese Tart is so popular in Saporro and now in Hong Kong.  Since I won't be visiting these places any sooner.  I decided to try my hand at it.

When I first came to know about this tart, there were only two recipes available online and both doesn't seems to be the close to the original.  

Within a month or so, more recipes were popping up in the cyberworld.

Actually my crave picks up again after talking to a fellow blogger who went to Japan recently.  Since I have all the cheeses on hand, I pick this recipe to try.  I will be eagerly looking forward to her experiment as hers might be the closest to the real stuff.  


Findings: When you cut immediately after baked, the lava effect is very evident.  


Upon resting around 5 mins, it will not be runny but will still yield a soft curd.

Overall, the tart is yummy but as to whether it is the same as the original, I was told that the original has a distinct cheese taste as I guess I won't be able to replicate that as getting Japanese cheese is not easy.

Perhaps you can incorporate sharper cheese and let me know how your experiment turn out.

In the meantime, I think this will be able to satisfy my craving for the time being.
Adapted : Siu Kitchen

What you need:
yield 8 pcs

Crust

40g unsalted butter
40g icing sugar
30g egg 
100g cake flour

Method:

Cream butter with icing sugar until light and fluffy.

Add the egg and mix well.

Add in cake flour and knead to incorporate well.  DO NOT OVER KNEAD.

Place dough in cling film and let it rest in the fridge for ½ hour.

Divide dough into 8 balls and shape dough into the mould.

Poke little holes in the dough and blind bake for 12 minutes at 180°C until light golden brown.

Note: Air Fryer at 170°C for 10 mins


Cheese Filling

160g cream cheese
15g parmesan cheese
40g icing sugar
80g milk
15g unsalted butter
50g egg, beaten

Method:

Melt cream cheese, parmesan cheese ang icing sugar over a bowl of boiling water.

Add the milk and butter and mix again until smooth.

Remove bowl from heat and stir in egg.

Pour the cheese filling into the baked tart crusts and then bake for 5 minutes at 180°C.

Cool tart a little before removing.


Note: Air fryer: 180°C for 5 mins.


Enjoy!

Friday, 23 October 2015

Air Fried Almond Butter Cake

This Butter Almond Cake was popular in a FB group and I saw many successful attempt on it and had positive reviews as well.  Bookmarked it until now then I found motivation to bake a cake.

The weather had been so bad that I was totally not motivated to clank up the oven.  Even the bake chicken we had last night was done by Happycall pan.

Realised I have not bake a cake for awhile so here is the good push for me to do so.

I decided to use the air fryer to bake this cake.  My first attempt failed as it got deflated after cooled.  I think I underbaked it but luckily I didn't have to feed the bin.

The second attempt was a much better one and I baked it longer.  


Findings: The cake looks dense but yet it is soft.  The almond meal gives the cake a nice fragrance as well.

This recipe is definitely a keeper

Source: Enne Ty  

What you need:

100g butter, melted
50g almond meal, extra fine
63g cake Flour
3 eggs, separated

½ tbsp almond essence
80g sugar (40g and 40g)

¼ tsp salt

Method:

Grease and lined a 5” square pan.  Preheat oven to 145°C.

Beat egg yolk, sugar and salt until light and fluffy.

Add vanilla extract and melted butter and continue to beat for a 1 min.

Sift cake flour and mix in almond flour.  Mix well.

Fold in flours to the egg mixture.  Set aside.

In a clean bowl, beat egg white and sugar until stiff peak.

Fold in ⅓ of the egg white to the flour mixture to loosen the batter and the remaining egg whites in.

Pour into prepared pan and bake for 45 - 50 mins or until it is done.

Note: if bake in oven it will be at 160°C and for double the recipe, the pan is 7".


Wednesday, 23 September 2015

猪笼饼 (Piglet cookie) (Airfryer)

This year, due to the haze and my asthmatic cough, I lost the mood to make mooncakes despite getting all the ingredients together.

Was down at Taka for an errand the other day, and I noticed that not as many stalls participating as before.

Like those truffle mooncakes that I shared in 2011, many people wrote to me asking me where I bought it.  Ingredients are also getting easier to purchase these days and thus home made are getting popular as well.

As mom is inviting us over for this Mid Autumn Festival celebration, I think it will be nice to bring some over for them.  (By the way, I heard so often kids calling this festival as Mooncake Festival which is wrong)

So today, to start off, I will attempt 猪笼饼 which is something that my son and my sisters loved.  (I hope they still do). 

The ingredients are really simple and easy to put together.  So you can try this for next year.


I couldn't find my fine brush for the egg wash and thus you can see my piglet is suffering from some skin disease. 

Also I think I lost my touch on figurine molding. Haiz.... out of practice.


I have saw a really cute bunny cookie selling at the basement of Taka and since Mid Autumn Festival also has a bunny story.  I thought it will be fun to have some bunnies around.

This recipe will be great to do with kids.  I remembered my mom used to tell us stories about 嫦娥 Cháng'é while we are eating mooncake and admiring the round moon.  Each trying to find the bunny as the weather is usually very clear on this night.  

Then again, I didn't think Mr Armstrong find 嫦娥 Cháng'é or the bunny during his trip up there.

Findings: This is a really nice recipe.  The cookies is not overly hard and yet has a nice fragrance to it.

I baked two batches but testing at different temp.  I find that at 170°C in the airfryer, cookie will cracked.

Adapted: Siu Kitchen

What you need:
yield 

100g Hong Kong f|our
60g golden syrup 糖漿
1 tsp alkaline water 食用梘水
20g bran oil

Method:

Add alkaline water to golden syrup and mix well.

Make a well in the flour and pour in the golden syrup mixture.

Add in the oil.

Slowly bring the flour into the centre and mix well.

Once liquid mixture is mixed into the flour and a dough is formed.

Knead dough until flour is well incorporated.

Clingwrap and let it rest for an hour.

Now you are shaped your piggy.

Greased baking plate, place shaped dough onto the plate and bake at 160°C for 6 mins.

For egg wash, after brushing bake it for another 1 min


Now let's have some fun. 

Monday, 14 September 2015

Milo Slice

My kids love Milo.  They can easily finish up a whole big tin within a month if I don't stop them.  I even found out that they eat Milo out from the can!  Luckily, my kids' body is not like mine.  If I do that, I think I will nose bleed.

So with this month Little Thumbs Up's Milo event, it is easy for me to put together something.

I am going for Milo slice as I have never done this before and I think it is a good choice for my daughter's lunch box because since she fractured her wrist, it will makes life easier for her not having to queue for food in the canteen.


Findings: My slice is pretty thick as I was too lazy to clank up the oven so I just used a 5" X 5" square that is big enough to fit into my air fryer.  I should have re look at the recipe again, instead of baking it for 20 mins, I baked an extra 8 mins.  So I think it resulted in a dryer piece of slice.  

But overall, I quite like the taste.  

What you need:

80g brown sugar
20g castor sugar
50g rolled oats
125g milo
80g self raising flour
75g plain flour
85g almond meal
1 egg
125g melted butter

Method:

Preheat oven to 180°C.  Greased and Line a 5” baking square pan. (I used air fryer at 170°C)

Mix all dry ingredients together in a mixer.

Whisk the egg and melted butter until combined.

Pour the egg mixture into the dry ingredients and mixed until all is combined thoroughly.

Pour batter into a pan and level out evenly.

Bake for 15 – 20 mins.

Drizzle in melted chocolate (optional)


Am submitting to Little Thumbs Up September (Milo) hosted by
Bake for Happy Kids and my little favourite DIY 


Have fun with this.

Thursday, 10 September 2015

Scottish Shortbread

I like Scottish shortbread for its rich buttery flavour but I don't recall ever baking some on my own.  So today I decided to give this a go.

I added in some Earl Grey but since I have no chance to infuse the tea in this recipe, the taste didn't come out much.

But this is so good together with a cup of tea over some reading up.


Source: Two Tarts


What you need:

145g unsalted butter, softened
40g icing sugar
20g sugar
210g plain flour

Method:

Preheat the oven 180°C.  Lined a 8” X 8” baking pan.

Beat butter, icing sugar, castor sugar and salt until it is light and fluffy. (medium speed)

Sift in plain flour, mixed to combine.

Lightly knead until well blended and smooth. If the dough is too dry to hold together, sprinkle a few drops of water over it, just enough to for dough to come together.  Do not over add water.

Firmly press the dough into the pan to form a smooth, even layer. Pierce the dough deeply with a fork all over in a decorative pattern.

Bake until it has a slight tinged of pale gold and just slightly darker at the edges, 40-50 minutes.

Remove the pan to a rack and let cool until barely warm.

Cut almost through the dough to form bars.

Let stand until completely cool.

Retrace the cuts, and separate into bars.


Air fryer: 160°C for 30 mins. with foil cover for 20 min and the last 10 mins uncovered.


Enjoy!

Thursday, 23 July 2015

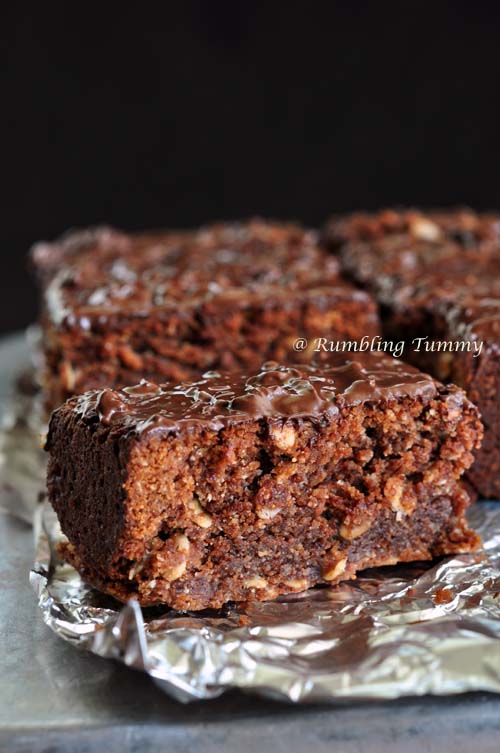
Almost Famous Chocolate Cake

Some time back, this Almost Famous Chocolate Cake on FB was very popular.  As usual I am also late to try things that I spotted on the internet. 

I decided to give this a go.  You see, using air fryer to bake cake is so much easier for me.   It is fast and economical as I prefer to bake scale down cakes for my small family these days.

Since this week, I have more people in the house, it will be a joy to share this with them.


Findings: I took a little longer than 35 mins to have the centre of the cake cooked.  Over all the texture is moist and soft.  

Now if you want to have a quick fix for chocolate cake, this will be the one to go for.

Source: The Almost Famous Mom

What you need:

180g dark brown sugar
109g plain flour
60g unsweetened Cocoa Powder
¾ tsp baking powder
¾ tsp baking soda
½ salt
1 egg
½ cup fresh milk
¼ cup vegetable oil
1 tsp vanilla extract
½ hot water
1 tsp of instant coffee powder

Method:

Preheat the air fryer at 180°C for 5 minutes.  Greased and lined a 5” round pan.

Sift flour, cocoa powder, baking powder, baking soda and salt together.

Add sugar into flour mixture.

Whisk egg, milk, oil and vanilla extract together.

Add flour mixture into egg milk and whisk until all mixtures are fully incorporated.

Lastly, mix in hot water until mixture are well combined.

Pour the mixture into the baking pan and cover the baking foil with holes punctured on the foil to release steam.

Lower temperature to 160°C and air bake it for 35 minutes.

Remove foil and continue baking for another 10 minutes or until cooked.

Let cake cool in the pan for about 10 minutes before removing. 

Remove and cool further on rack.


Enjoy!