Showing posts with label Chiffon Cake 戚风蛋糕. Show all posts

Tuesday, 23 June 2020

Passionfruit Chiffon

When I was in Canada last year, my SIL has this really cool gadget.  It is compact yet just a little bigger than our toaster, yet you can set the different temperature just like an oven and it heats up fast too.  Back then, I wonder why such cool stuff never is available in Singapore.

Like a dream comes true, bingo, I saw that Kitchenaid is launching one.  So delighted when Victoria bakes is running a giveaway event for this beauty.

I just had to try my luck to win one.  At least I have an excuse to ditch our dated toaster.  If not, I will have to be stuck with it until it is done with its life span.


Learning experience:

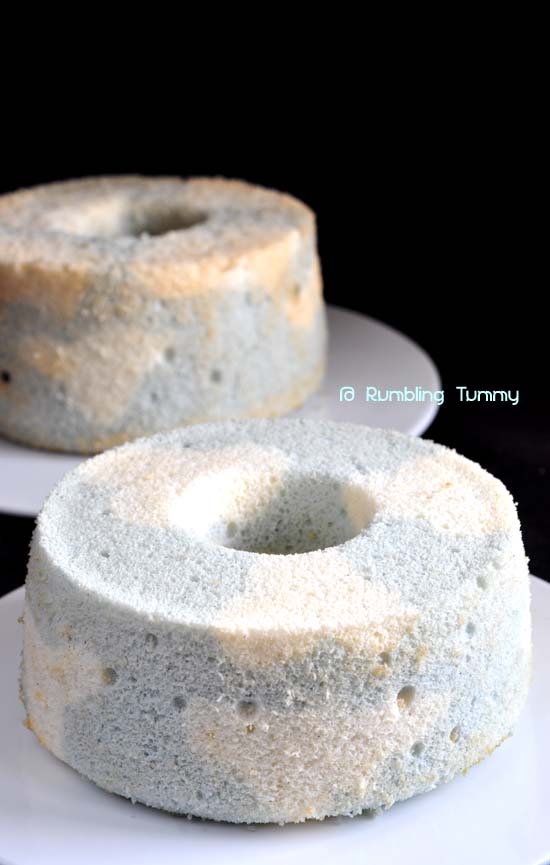
The texture is really good.  It has this cottony soft texture that I like.  My glaze was a little too diluted as I was concern that it might be too sweet but actually, with the glaze, the passionfruit flavour stood out even more.  


What you need:

2 egg yolk
8g sugar
40g cake flour
4g cornflour

28g passionfruit juice
20g oil
½ tsp vanilla

2 egg white
30g sugar
7g lemon juice

Method:

Preheat oven to 150⁰C. Prepare 6” chiffon pan.

In a small pot, combine passionfruit juice with vanilla, sugar and oil.  Heat to about 40⁰C.  Transfer to a bowl.

In another bowl, sift cake flour and cornflour together.

Add into the warm passionfruit juice mixture and whisk until smooth.

Add in egg yolks and whisk to combine.  Set aside.

In a clean bowl, whisk the egg white and the sugar and then the remaining sugar.

Whisk in lemon juice.

Fold ½ meringue into the yolk batter and fold well.  Fold in the remaining meringue.

Pour in the batter

Tap to get rid of bubbles.

Bake for 20 mins or until a skewer comes out clean.

Invert to cool and then remove.

Zest lime and add in 14g passion fruit juice.

Sift in 80g icing sugar and stir to make the glaze.

Drizzle onto the cake.


Note: I don't like the seeds of the passionfruits.  If you don't mind, you can don't filter them off.

Enjoy!

Thursday, 30 August 2018

4 Ingredient Chiffon Cake

Saw R attempted the 3 ingredient chiffon cake some time back, I was curious how this cake will turn out as it has no oil to it.

Since I am at a lost as to what to offer for tomorrow's breakfast, I went for it.  

I think my kids will not appreciate a plain cake so I added in cocoa powder to entice them which turn it into a 4 ingredient chocolate chiffon cake.


Learning experience: 

Since I have converted it into a chocolate cake, I increased the sugar level to counter the dark chocolate.

Am happy how this turned out.


What you need:


4 egg yolks

30g castor sugar
44g cake flour 
25g cocoa powder

50g castor sugar
4 egg whites

Method:

Preheat oven to 170°C. Prepare a 7" cake pan without grease.


Sift cake flour with cocoa powder.  Set aside.


Beat egg yolks with 3 tbsp of sugar until it is light and fluffy.


Beat in cake flour (in two additions).


Whisk egg white with 3 tbsp of sugar until stiff peak.


Fold egg whites into batter.


Bake for 30 mins or until cooked.


Enjoy!

Thursday, 19 July 2018

Black Sesame Chiffon 黑芝麻戚風蛋糕

Bought a bag of black sesame during a Batam trip and I think it is about time to finish it up.

As I am not sure whether this quality is as good as those Japanese ones, I decided not to take the risk and instead bake a Black Sesame Chiffon 黑芝麻戚風蛋糕 instead.


Learning experience: 

I like how the cake turned out pretty fragrant.  Since I baked this in the air fryer, I will next attempt in a smaller tin as I prefer it to be taller and also the cooked dough method.

I wonder whether I will burn the top.

Will update when I have a chance.

What you need:

3 egg yolks
20g castor sugar
50ml grapeseed oil
50ml milk
80g cake flour
20g sesame powder

3 egg white
50g castor sugar

Method:

Preheat oven to 170°C.  Prepare a 7” chiffon pan. (will try 6" in next attempt)

Whisk egg yolk and sugar until light and fluffy.

Mix in sesame powder until well blended.

Stir in the grapeseed oil and water and full incorporated.

Sift in the cake flour and mix until combined.  Set aside.

Whisk the egg white until foamy and slowly drizzle in the sugar.  Whisk till stiff peak.

Fold ⅓ of the meringue into the egg yolk batter.   Do the same with the remaining meringue.

Pour into pan and bake for 30 mins.

Let cake cool in pan completely before removing.


Enjoy!

Thursday, 31 May 2018

Cloudy Skies Chiffon Cake

I have not baked a chiffon for a while and since I have missed out the hurricane event in Bake Along, I wanted to join in the fun this time.

Even though I have Susanne's book that was a gift from my sister, I have yet to attempt any of her recipes.  So I am kind of nervous attempting this Cloudy Skies Chiffon Cake

I am trying not to put colourings into the cake so I made the blue pea extract stronger.  Hope this will work.


Findings: As I am not confident in using a big pan for this.  I divide it into two cake pans.

I am not sure whether using a bigger pan will make it easier on those clouds but I find it difficult to "make" those little clouds in the smaller pan.  Initially I was using the spoon to scoop the white batter onto the pan but subsequently, I transfer the batter to a piping bag and it was much easier.

I noticed that I get air bubbles in between the layers.  I think if I ever attempt this again, I will pipe the clouds, lined the clouds and fill in the layer, tap out the air bubbles and repeat process.   By this, I hope that I will be able to get rid of most of the air bubbles.

Only thing is that I find the cake after cooled is very sticky to touch.  I even tried baking it a little longer but this issue did not go away.

Nevertheless, I must say that this cake texture is good and fluffy.  Not too sweet as well.

I also intensified the blue pea colour as I do not want to add any artificial colouring to the cake.

Overall, this recipe is a keeper.


What you need:

1 egg (60g)
27g castor sugar
53g grape seed oil
51g + 2g water
7g vanilla paste
90g cake flour, sifted
8g blue pea flower extract *

195g egg whites
¼ tsp cream of tartar
60g castor sugar

Method:

*Blue Pea Flower extract:
Quickly rinse 4g dried blue pea flower and pour in 10g of hot water.  Let it sit for 15 – 30mins and strained.

Preheat oven to 160°C.  Prepare a 7” chiffon pan.

Whisk egg yolks with sugar until light and fluffy. 

Whisk in oil and 51g water and vanilla extract.  Mix until incorporated.

Whisk in cake flour until well blended. 

Remove ¼ of the batter and add in 2g water.  Mix well.  Set aside.

Add blue pea flower extract to the ¾ batter and mix well (if colour is not strong, add a little light blue food gel).  Set aside.

In a clean bowl, whisk egg whites and cream of tartar until foamy. 

While whisking, slowly drizzle in the sugar and whisk until firm peak formed.

Remove ¼ of the meringue.

Fold the ¾ meringue gently into the ¾ egg batter.

Fold the ¼ meringue gently into the ¼ egg batter.

Using a spoon, form little clouds from the ¼ batter onto the pan.

Scoop the blue batter around the white and filled the rest with the a little blue batter (layering).  Repeat until both batters are used up.

Place a tray of water at the bottom and steam bake it at 140°C for 1 hour until cooked.

Invert pan immediately and let it cool completely before dismould.


Enjoy!

Thursday, 18 May 2017

Chocolate Chiffon Cake (air baked)

I have been down and out when I caught a nasty bug during my short break away.  Been a while I fell so ill and it is taking a long time for me to gain back my strength and momentum.  

Since I am craving for something sweet and my son is coming back from his own short break with his classmates, I thought it will be nice as a welcome home dessert for him.

About this Chocolate Chiffon Cake, I have already tried baking it twice.  The first time, I wasn't not happy with the texture as it was too moist.  The 2nd time, I baked it for my dad's birthday and it turned out well.  

It did not bother me that I don't have a chiffon pan that fits into the air fryer.  Anyway, it is not a must to have a chiffon pan to bake a chiffon cake.


While updating my FB Page, I realised that I always bake chocolate cake.  Guess it is time to try other flavours.

Enough said, now I am satisfied and hope this horrible bug I can get rid soon.

Observation: The cake is very soft and moist but able to "bounce" back when pressed.  The sweetness is just right for us.  

What you  need:

3 egg yolks
25g sugar
1 tbsp chocolate paste
50ml milk
3 tsp bran rice oil

50g cake flour

10g cocoa powder
1 tsp baking powder
3 egg white
45g sugar
¼ tsp cream of tartar

Method:

Line the bottom of a 7" round cake tin with grease proof paper.  Do not grease tin.

Whisk egg yolks with sugar till light and creamy

Add oil, milk and chocolate paste and combine well, then set it aside.

Sift in cake flour, cocoa powder and baking powder.  Whisk until smooth.

In another clean bowl, whisk egg white until foamy and add cream of tartar.

Add sugar in 3 batches. Continue to beat the egg white mixture till stiff peak is formed.

Fold ⅓ egg white into the egg yolk mixture till well mixed. Lightly fold in the rest of the egg whites with spatula until combined.

Pour 1 cup water in the bottom pan of the air fryer and preheat at 150°C.

Pour the batter into the cake tin.

Give the cake tin a few taps at the bottom to remove any huge air pockets.

Bake for approximately 25 mins.

Do take note not to fill the batter all the way to the brim of the cake tin, leave about ¼ of the space for cake to rise.

Once cake is baked, do a skewer test check to ensure the batter is fully cooked.

Remove cake tin from airfryer, invert the cake tin and allow the cake to cool completely before unmoulding.


Enjoy!

Sunday, 1 March 2015

Black Pearl Chiffon

P gave me the idea of baking chiffon for today's blogger gathering.  This is a good choice as I am sure many of us are getting sick and tired of rich food.   Then again, there are so many types of chiffon cake around and I recalled eating a seriously yummilious chocolate chiffon cake before (unfortunately I can't share that recipe)

So I decided to go along with that flavour and I remembered Black Pearl Chiffon was popular sometime back.  Thus I decided to try this one as I had never baked one before and I am not sure whether it was close to that yummy chocolate chiffon I baked.


Verdict: This cake is light, airy and it is chocolatey!  I shall now have a base to tweak.

Next round, I need to make those bubble smaller as I was told that a good chiffon must have fine bubble.

Source: I can't recall where I take this from, once I remember I will credit back.

What you need:

5 Egg Yolks
130g 70% Dark Cooking Chocolate
60ml Corn Oil
100ml Milk (I used chocolate milk)
55g Cake Flour
25g Valrhona Dutch-Processed Cocoa Powder
½ tsp Baking Powder
½ tsp Baking Soda
¼ tsp Salt

5 Egg Whites
70g Caster Sugar
½ tsp Lemon Juice

Method:

Melt chocolate (break into small pieces) over a pot of simmering water. Set aside to cook. 

Beat egg yolks till creamy, stir oil, milk and melt chocolate in order.

Next add in sieved flour mixtures (cake flour, cocoa powder, baking powder, soda & salt) and whisk till no trace of flour found. 

Beat egg whites with lemon juice till frosty then slowly add in sugar and beat till stiff peaks.

Using a balloon whisk gently fold in egg whites into the prepared yolks batter in 3 batches till no trace of whites and the mixture are well combined.

Lastly lift up the bowl to height, pour batter into the tube pan and tap the pan once or twice on a table top to get rid of any trapped air bubbles in the batter.

Bake cake in preheated 160°C degree oven (2nd lower rack) for about 43 - 45 minutes or when the surfaces turns golden brown (you can insert a skewer into the centre and test if it comes out clean). 


Remove it from the oven and invert the pan immediately to let it cool completely before unmoulding.

To remove the cake from the pan, run a thin-bladed knife around the inside of the pan and the center core.

Release the cake and run the knife/spatula along the base of the pan to remove the cake completely. 


Have a good week ahead!

Thursday, 10 July 2014

Avocado Chiffon Cake

Avocado is in season and prices are good too.  In the past, I only associate avocado with shrimp and avocado salad, california maki and avocado shake.

I decided to break out of my comfort zone and try using it to bake a cake!  I wanted to see whether the green hue will stay during high temperature baking.  So here is my attempt on Avocado Chiffon Cake.

Baking chiffon cake is not my forte, as you can see, my cake is ugly and coarse.  I wish I have the skill to make these a beauty.  haiz... another time perhaps.


Findings: The green hue was really subtle and the avocado taste is not evident at all.  Then again, avocado is basically tasteless but I am glad that this chiffon turned out to be light and fluffy.


What you need:

80g mashed avocado (I used a blender with 1 tbsp of lemon juice) 
3 egg yolks
50g white sugar
⅛ tsp salt
40g 45ml canola oil
3 tbsp water
85g cake flour
4 egg whites
50g white sugar
½ tsp cream of tartar

Method:

Preheat the oven to 180°C.

In a medium bowl, beat the egg whites, 50 g white sugar and cream of tartar until stiff and glossy peaks formed. You should be able to hold your bowl upside down without the egg whites falling out.

In a separate bowl, whisk together the egg yolks, the rest of the white sugar, salt, water and oil until combined.

Add the mashed avocados and beat until blended and smooth. If it doesn't seem to be getting completely smooth in the mixer, you might try running it through the blender very briefly. Gradually sift in the flour and beat in mixer until smooth.

Take about half of the egg white mixture and fold it into the batter (stir in the same clockwise motion with a spatula) until no egg white streaks remain. Then add in the remaining egg whites and fold until no streaks remain.

Pour the batter into the ungreased 7” chiffon pan.

Put cake in oven and bake for about 30 minutes until the cake’s surface is golden brown. When you touch the cake it should spring back.

Remove cake from the oven and revert the cake pan upside down on top of a plate to finish cooling and rising. Cake should still remain in the pan.

When the cake is completely cooled, gently run a plastic knife around the rim of the cake and then remove cake from pan.


Happy Thursday everyone!